Abrasives & prep
Sandpaper grits, finally explained.
The grit chart that goes on the prep-bay wall. FEPA vs CAMI, the five abrasive materials, the progression rule, and six mistakes that cost real money — written for the shop floor.
Chapter 1
P-grade vs. CAMI: read the box before you buy
Every sandpaper chart starts here, because half the problems on a body shop floor trace back to somebody pulling the wrong grade off the wall. Two competing standards are in use in North America, and they are not the same number.
FEPA (the P-grade)
FEPA is the European standard, marked with a P prefix — P80, P180, P320, P1500. This is what you'll see on 3M Hookit, Mirka Abranet, Sia, Norton, and nearly every pro-grade disc sold in a refinish line. FEPA grades tighten their particle-size distribution at the fine end, which matters when you're feathering primer.
CAMI (the US industrial)
CAMI is the legacy US industrial standard — no letter prefix, just a number like 80 or 320. You'll see CAMI on hardware-store rolls, hand pads, and a lot of home-improvement sheet goods. For coarse grits (60–120) the numbers are close to FEPA. Above that, the two standards diverge fast.
Where it matters
- P320 ≈ 280 CAMI — one-grit rougher than you'd think.
- P600 ≈ 400 CAMI — one full grit coarser.
- P1500 ≈ 800 CAMI — nearly double the scratch depth. This is where shops get burned — a tech grabs a CAMI 1500 off a home-center shelf for a clear-coat wet-sand and leaves scratches a buffer can't pull out.
Rule: in a body shop, stay P-graded. If the box doesn't have a P prefix, it's not for a paint line.
Chapter 2
The five abrasive materials you'll actually use
The grit number tells you the scratch depth. The material tells you how long the disc lasts, how hot it runs, and what it's allowed to touch. Five families cover 99% of body shop work.
1. Aluminum oxide — the workhorse
Tan, red, or brown discs. General-purpose cut, reasonable life, cheap per disc. If it's a utility grit (P80 for filler shaping, P180 for knock-down), aluminum oxide is almost always the right call. Most 3M, Norton, and Mirka red discs are AlOx.
2. Silicon carbide — the wet-sand specialist
Black or dark grey, almost always paper-backed, almost always used wet. Sharper and more brittle than AlOx — it fractures mid-cut and keeps exposing fresh edges. Used for P1500–P3000 clear wet-sand and for sanding plastic bumpers.
3. Ceramic — the long-life cutter
Orange, purple, or red-purple. 2–4x the life of aluminum oxide, runs cooler, holds its edge on hard substrates like 2K urethane primer and cured e-coat. Slightly more money up front, far less money per panel. Mirka Gold, 3M Cubitron II, Norton ICE in the ceramic lines.
4. Zirconia alumina — the hot aggressive
Blue or green discs, often on fiber backings, used in stripping and heavy stock removal. Zirc runs hot and cuts hard — the right pick for removing 20 years of paint from a classic, wrong pick for feathering primer.
5. Trizact / structured abrasive — the polish-prep
3M's engineered pyramidal abrasive — each "disc" is actually tens of thousands of tiny pyramids bonded to a film. Super-consistent finish, used for P1500–P3000 clear prep and buffer pre-stage work. Expensive, but one disc finishes a whole car.
Chapter 3
The full grit chart, by task
This is the chart we print out, laminate, and tape to the wall of the prep bay. Memorize the left column and you've solved 90% of prep-grit questions on the floor.
| Grit | What it does | When to reach for it |
|---|---|---|
| P24 – P36 | Rip-level stock removal | Rust stripping, heavy mill-scale, removing thick old paint on a frame-off resto |
| P40 – P60 | Aggressive shaping | Initial filler knock-down, bondo shaping before pin-holing |
| P80 | Filler finishing | Final body-filler shaping — the last grit before primer surfacer |
| P120 | Filler transition | Transitioning filler edges into surrounding paint, removing P80 scratches |
| P150 – P180 | Primer-surfacer prep / feather-edging | Feathering a paint edge before priming, scuffing OEM e-coat for adhesion |
| P220 | Block-sanding primer | Guide-coat reveal on high-build primer — the grit every panel gets blocked at |
| P320 | Sealer prep | Final primer sand before sealer. The grit that goes under almost every basecoat. |
| P400 – P500 | Base-coat prep on single-stage or sealer | Smoothing sealer micro-texture before base, scuffing single-stage for blend |
| P600 | Blend-scuff / plastic prep | Scuffing bumpers and blend zones, light clear scuff for touch-up |
| P800 – P1000 | Clear prep (rare, surface-specific) | Pre-buff on extreme orange peel; most jobs skip this and go straight to 1500 |
| P1500 | Wet-sand clear | Nib-removing, orange-peel knockdown, color-sand pre-buff |
| P2000 | Wet-sand fine | Second stage of a cut-and-buff, edge-feathering on a clear repair |
| P3000 | Machine-polish prep | Trizact-style disc used with DA before compound stage. Cuts out the heaviest haze polish can't pull. |
Chapter 4
The progression rule: never skip more than one grit
If you take P80 and jump straight to P320, the 320 can't cut out the 80-scratch. It'll polish the surface around the deep scratch and leave a fingerprint of the original grit under the base. Two coats later, it shows up as a ring halo in the clear, and you're sanding back.
The rule pros live by
Never jump more than one grit number in the sequence. In real terms:
- From P80 → P120 is safe.
- From P80 → P150 is borderline (works on soft filler, fails on primer).
- From P80 → P180 is a guaranteed rework.
The five-step standard progression
- P80 — filler knock-down and shape.
- P120 — transition into surrounding paint, remove 80 scratches.
- P180 — feather-edge, last grit before primer.
- P320 — final pre-sealer block sand.
- P600 — blend-zone scuff if single-stage base.
This is five discs per panel for most jobs. Discs are $0.40–$1.50 apiece. Cut-back labor is $70-150/hr. Don't save a disc to spend an hour.
Chapter 5
Wet-sand, color-sand, and the cut-and-buff sequence
Almost every show-quality paint job ends with a wet-sand. It's how mirror finishes happen, how orange peel flattens, how nibs in the clear disappear before the customer sees the car. The grit sequence here is tight.
The cut-and-buff chain
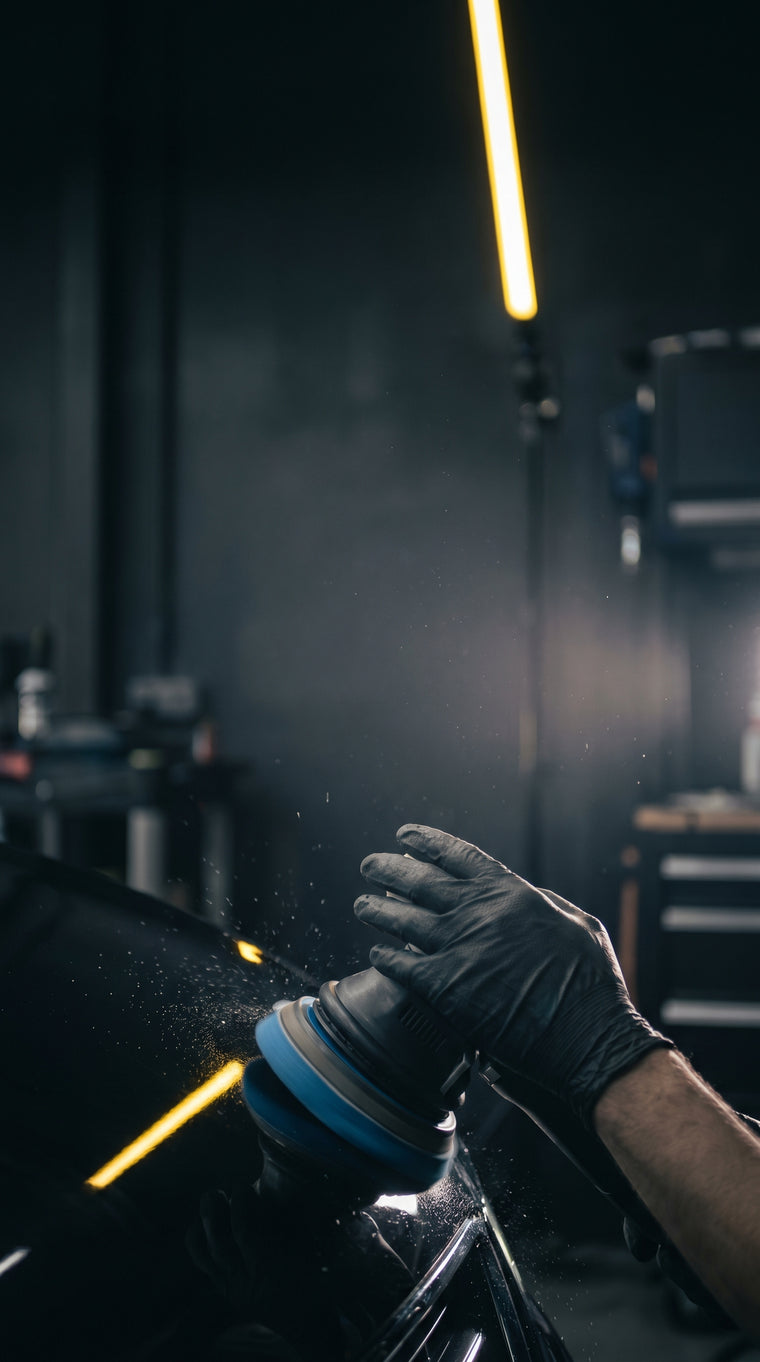
- P1500 wet — knock down clear peel and nibs. Use plenty of water with a soap-drop, interface pad on a DA at 2500-3500 OPM. Sand until the surface goes uniformly matte with no shiny valleys. Any shiny spot is a low spot — stop and re-check your technique.
- P2000 wet — remove the 1500 scratch. This is quick — 30–60 seconds per panel, same fluid, just cutting out the heavy scratch.
- P3000 Trizact — pyramidal abrasive on DA, usually dry on a foam interface. Cuts the P2000 scratch down to a state that 3M Perfect-It 1 compound can pull out in one stage.
- Compound — 3M Perfect-It, Menzerna Fast Gloss, or equivalent on a wool pad. Cuts the P3000 scratch and delivers a slight haze.
- Polish — finishing polish (3M Finesse-It, Menzerna Super Finish) on a foam pad. Removes haze and gives the deep wet look.
- Final wipe — IPA 50/50 and microfiber. No waxes or glazes on a new clear — let it gas for 30 days first.
The water temperature trick
Pros keep the wet-sand water about 75–80°F. Cold water tightens the paper, reduces the effective cut rate, and makes the clear feel harder than it is. Warm soapy water runs a much smoother cut. A one-gallon insulated jug in the bay is $12 and saves the technique from being weather-dependent.
Chapter 6
Six grit mistakes that cost real money
- Using P80 on OEM e-coat. E-coat is your corrosion barrier. Cutting through it exposes bare metal. P150 is the floor — never coarser — for scuffing OEM coatings.
- P40 on plastic bumpers. The P40 gouges will telegraph through three coats of flex primer. Plastic wants P320 or P400 with a flexible disc — nothing coarser.
- Wet-sanding fresh clear before it's gassed. Most urethane clears need 24–48 hours before wet-sand; ceramic clears can need 72+ hours. Sand too early and the clear shrinks around the scratch as it continues to cure, reopening pattern lines two weeks later.
- Dry-sanding silicon carbide. SiC is designed to be used wet. Dry, it loads up in 30 seconds and burns the paper. Use AlOx for dry jobs.
- Grabbing a P1500 disc when the rack is out of P2000. A 1500 scratch needs a full P2000 pass to clean up. Skipping it leaves a scratch the buffer amplifies into a halo.
- Using a single disc on three panels. Abrasive grit fractures and dulls. A dull P320 disc becomes a de facto P220 and polishes the surface instead of cutting. Change discs before the cut-rate drops.
Keep reading
More from the bay.
PAINT
How to match single-stage urethane
Sprayout cards, flip-tone control, tri-coat mid-coat counts, and the 18-inch blend rule — the color-match guide you wish you'd read before your last tri-coat redo.
COLLISION
Panel-bond vs. weld: when to use what
When structural bonding beats the welder, when OEM procedures force your hand, and the bond-line prep that actually holds.
DETAIL
Ceramic coating prep, start to cure
IPA wipes, polish stages, silica-safe sealers, and the humidity window that decides whether a coat takes or streaks.
Work with us
Open a trade account, skip the retail markup.
Volume pricing on every SKU, same-day ship by 3pm CT, Net 30 after three clean orders, and one rep who knows your bay. Built for the shops that go through a case of panel bond a month, not a tube a year.